Rich, if you open the red door in the BBP shop there's a steel fab-shop on the other side you can use anytime you like. Just in case you'd not thought of it.That will be job one in the new year ! Bodywork wise I need to rebuild the air intake ducts and the armoured radio battery box which sits on the rear armour.
Richie's Little Tank
-
Renegadenemo

- Posts: 5176
- Joined: Mon Dec 01, 2008 12:29 pm
- Location: N E England
- Contact:
Re: Richie's Little Tank
I'm only a plumber from Cannock...
"As to reward, my profession is its own reward;" Sherlock Holmes.
'It ain't what they call you, it's what you answer to.' W.C. Fields.
"As to reward, my profession is its own reward;" Sherlock Holmes.
'It ain't what they call you, it's what you answer to.' W.C. Fields.

Re: Richie's Little Tank
I am enjoying this thread very much.
Thank you.
Thank you.
Obstacles are those frightful things you see when you take your eyes off your goals.

Re: Richie's Little Tank
Amidst sorting the armour out I was also in the process of dismantling any seized items (that would strip down without damaging them) cleaning and rebuilding them, some items had been rebuilt and placed into storage until I was ready for them.
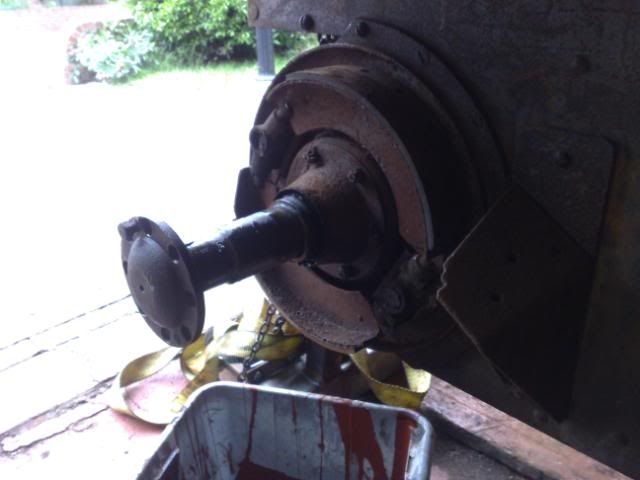
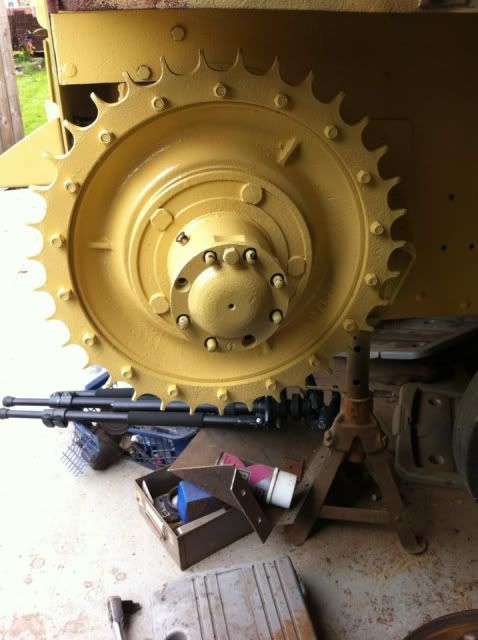
I turned my attentions to the drive axle which the drivers side brake drum was utterly seized ! As a result of this the seller had pulled the tracks off to move the carrier, I tried all manner of pullers which were too feeble for the job as I was reluctant to put any serious heat into the cast drum, and I felt the amount of gas it would have taken to heat soak the thing sufficiently would cost me a small fortune ! I decided I would start with some very gentle heat and the use of a wooden mallet and tap the outside of the drum until I had been right around the thing, I then elected a good sized slide hammer of which I made a boss to fit into the brake hub and slowly drifted the hub off. The cause of the seizure was due to an asbestos seal where the back plate meets the drum which had a metal band contained within it, this band had rotted and had swollen up causing the drum to stick. The bearings were inspected and found to be in mint condition as were the brake pads !!!!!!
Here is the hub before I started

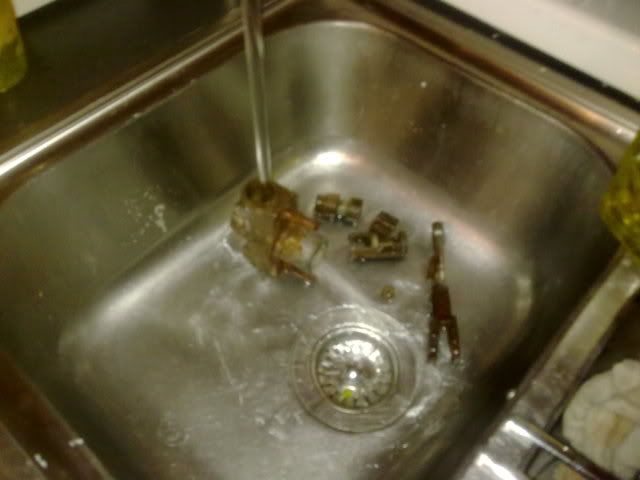
Once I got it off I cleaned the rear hub back plate and red oxide primed it. I then pulled the expander off, the brake system on a carrier is 100% mechanical rather than hydraulic the expander consists of a push/pull rod which has a cone and two tumblers, as the tumblers are forced out wards they hit two plungers on each end of the expander, which in turn pushes the brake shoes out.
Here is the expander getting a quick rinse
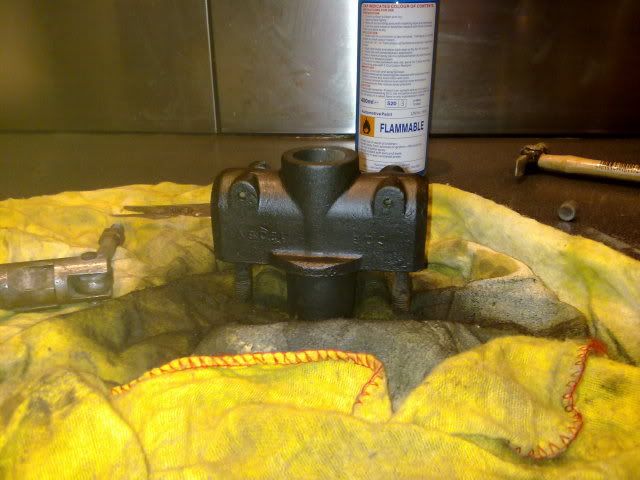
Followed by a cleanup with wet and dry and a flash over of paint
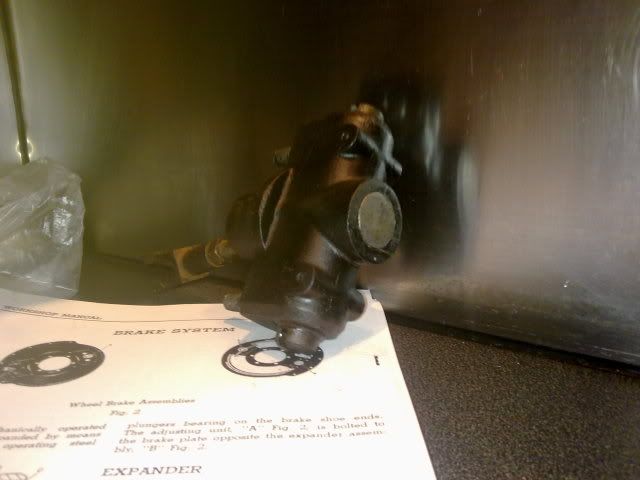
Then returned to the axle

Before the hub went back on.
The only worry I have about this part of the rebuild is not pulling the diff to bits, the thought of having to try and pre load the thing made me think twice. I justified my cowardice by using one of the endoscopes from work to check inside for broken teeth or swarf and rust, also the whole unit spun as it should and was nice and smooth.
So when something goes pop at that end, I will eat my words.
I turned my attentions to the drive axle which the drivers side brake drum was utterly seized ! As a result of this the seller had pulled the tracks off to move the carrier, I tried all manner of pullers which were too feeble for the job as I was reluctant to put any serious heat into the cast drum, and I felt the amount of gas it would have taken to heat soak the thing sufficiently would cost me a small fortune ! I decided I would start with some very gentle heat and the use of a wooden mallet and tap the outside of the drum until I had been right around the thing, I then elected a good sized slide hammer of which I made a boss to fit into the brake hub and slowly drifted the hub off. The cause of the seizure was due to an asbestos seal where the back plate meets the drum which had a metal band contained within it, this band had rotted and had swollen up causing the drum to stick. The bearings were inspected and found to be in mint condition as were the brake pads !!!!!!
Here is the hub before I started
Once I got it off I cleaned the rear hub back plate and red oxide primed it. I then pulled the expander off, the brake system on a carrier is 100% mechanical rather than hydraulic the expander consists of a push/pull rod which has a cone and two tumblers, as the tumblers are forced out wards they hit two plungers on each end of the expander, which in turn pushes the brake shoes out.
Here is the expander getting a quick rinse
Followed by a cleanup with wet and dry and a flash over of paint
Then returned to the axle
Before the hub went back on.
The only worry I have about this part of the rebuild is not pulling the diff to bits, the thought of having to try and pre load the thing made me think twice. I justified my cowardice by using one of the endoscopes from work to check inside for broken teeth or swarf and rust, also the whole unit spun as it should and was nice and smooth.
So when something goes pop at that end, I will eat my words.
"You can screw a man down until he takes to drinking......take me to the fantastic place..."

Re: Richie's Little Tank
The finished job looks A1 Richie. I am sure your carrier will be better than new when complete.
The expander "getting a quick rinse" in what seems to be the kitchen sink reminded me of a set of instructions in the Norton Owners' Club magazine for refurbishing a cylinder head. A list of suggested tools and aids included, for the purpose of initial de-greasing:
Dishwasher (Wife definitely out)
Keep it coming, it's fascinating stuff.
1 in 10 people understands binary. The other one doesn't
-
Renegadenemo
- Posts: 5176
- Joined: Mon Dec 01, 2008 12:29 pm
- Location: N E England
- Contact:
Re: Richie's Little Tank
I've done loads of cylinder heads and pistons in the dishwasher but be careful - some dishwasher salts turn the ally black and it's a real bitch to get it shiny again. Wife definitely out is good advice though.Dishwasher (Wife definitely out)
My ex used to go crackers about it and one day after she'd shouted at me for putting all my 'crap' in her dishwasher I told her in no uncertain terms it was going nowhere until she could at least describe what she wanted shifting using the proper terminology.
Score one for the Interweb when she reappeared half an hour later and told me to get the crankshaft, con-rods and pistons out of her machine before they ended in the wheely bin.
I'm only a plumber from Cannock...
"As to reward, my profession is its own reward;" Sherlock Holmes.
'It ain't what they call you, it's what you answer to.' W.C. Fields.
"As to reward, my profession is its own reward;" Sherlock Holmes.
'It ain't what they call you, it's what you answer to.' W.C. Fields.
Re: Richie's Little Tank
On the theme of working parts being cleaned, I found some pics of other bits I had bothered to take pictures of during the restoration.
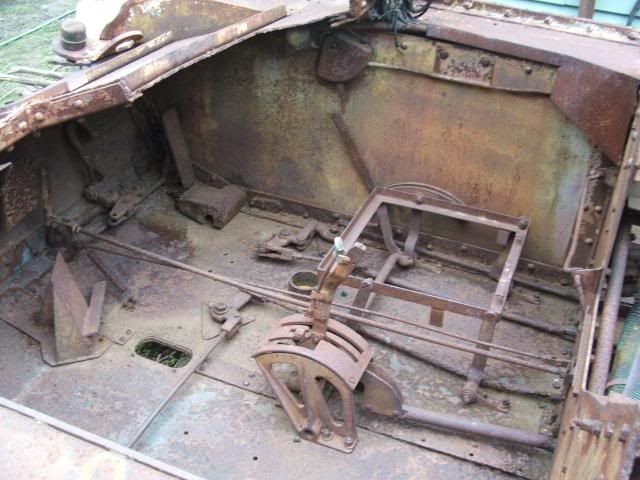
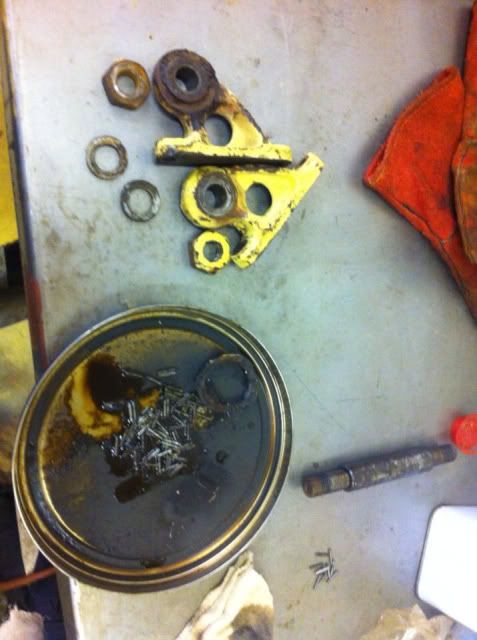
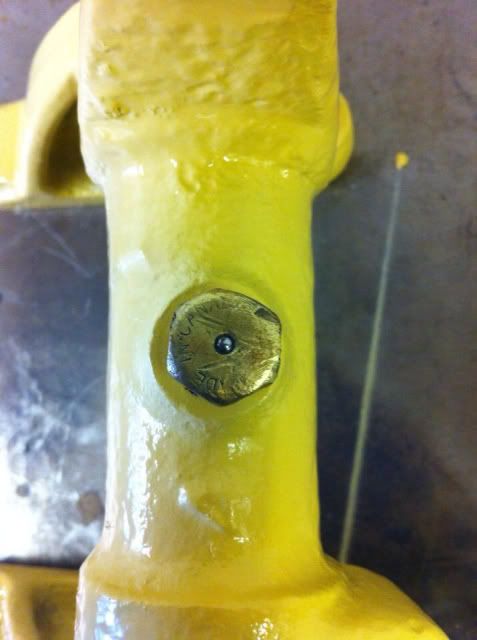
Here we have the gear stick base which bolts to the hull floor, it's a cast steel piece which has a spring and a bush inside, this clamps onto a steel ball at the base of the gear stick. On the side is the usual brass grease nipple. This was an easy bit to clean up, just pull it out the hull strip it down then rebuild and re paint.
The widget I am talking about is buried in the middle of this lot !
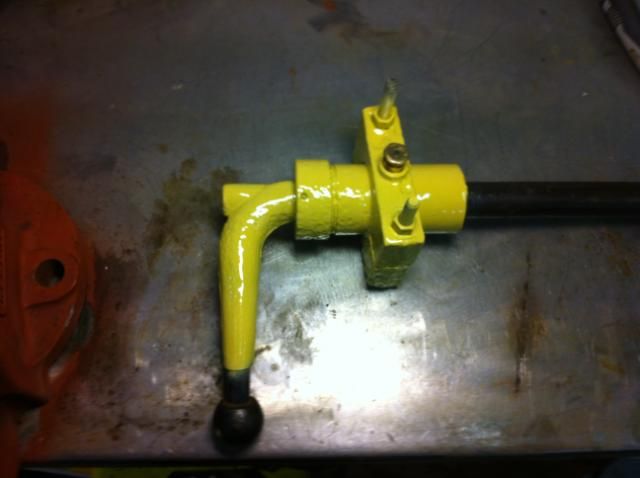
Then cleaned up into this
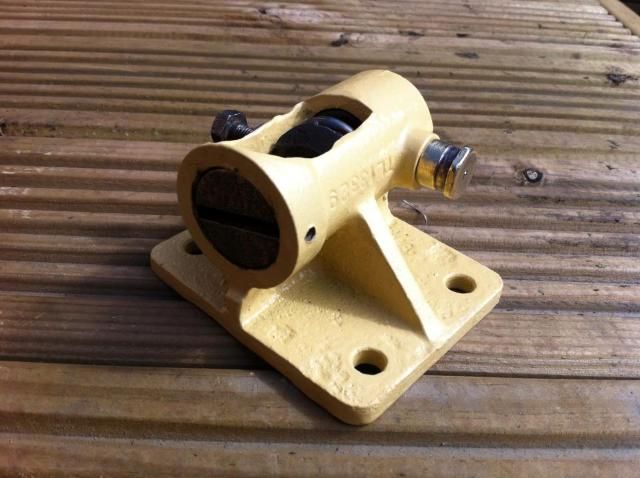
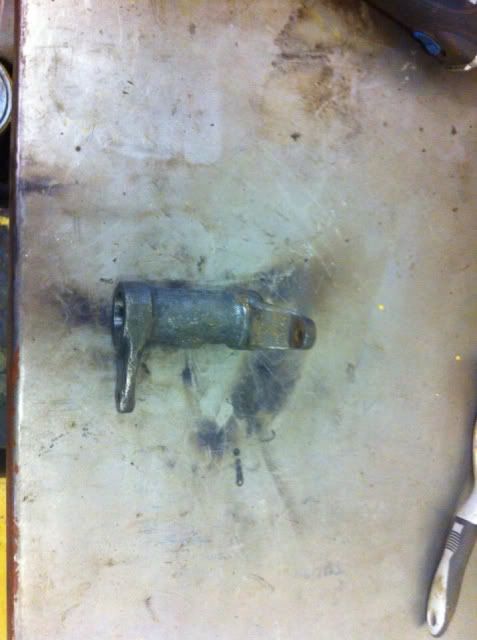
This was placed in storage awaiting its return. On the theme of gear sticks I thought I would continue to the other end of this system. From the base of the gear stick where the above widget sits is a shaft which runs through the centre bulkhead towards the rear, where another widget is bolted to the hull floor, the shaft runs through the widget and another large right angle cast component so fixed on. The cast item then connects to the swing bar on the gearbox which selects the gears.
Here is said widget removed from the hull and the shaft.
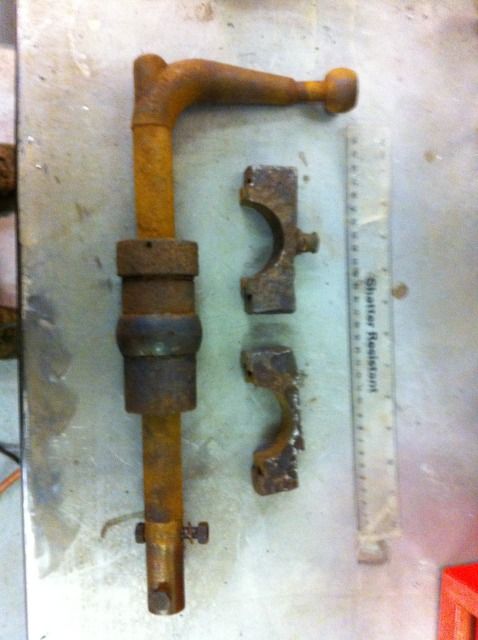
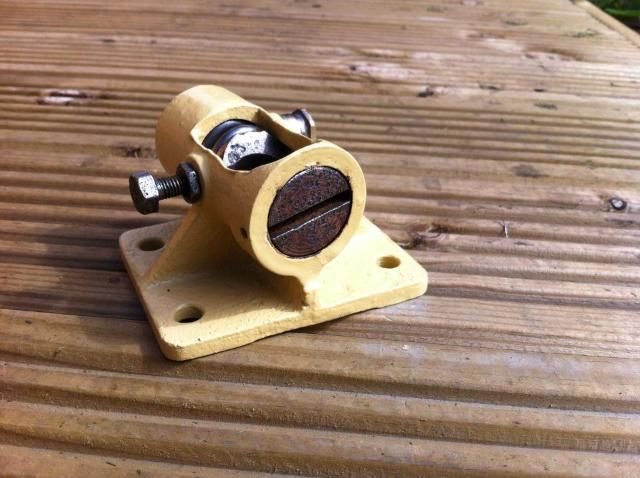
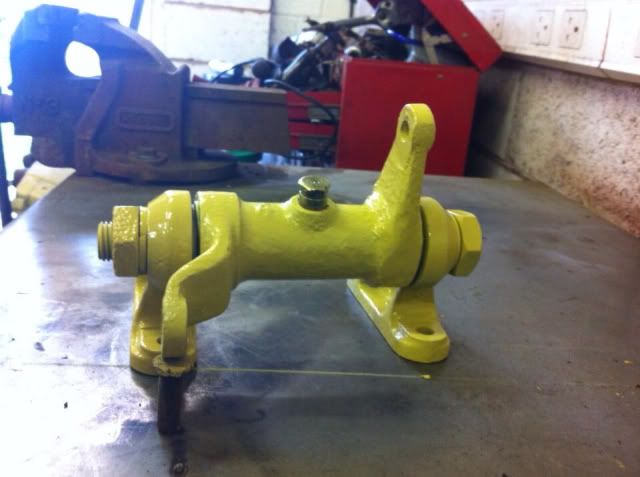
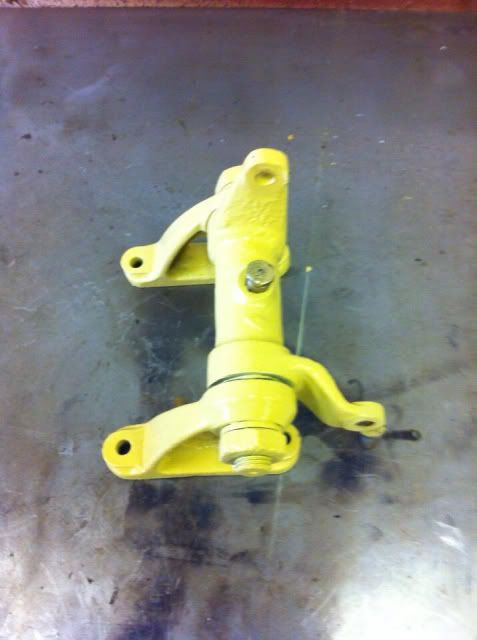
There is a cylinder which shrouds the cast poll, inside this is a bearing which floats with the poll and shaft and also allows the shaft to spin. I had to dismantle the shroud to extract the bearings and rebuild the unit. Once done it was cleaned down and rebuilt, then re painted and stored
Here is the complete unit before I pulled it out, partially hidden by a bracket which had fallen into the hull.
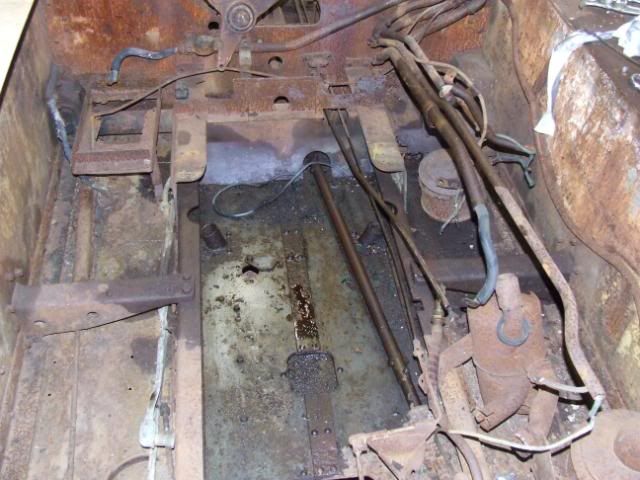
So far it's the little bits like this I have found give the greatest reward as you get quick results, and you feel you are getting somewhere
Here we have the gear stick base which bolts to the hull floor, it's a cast steel piece which has a spring and a bush inside, this clamps onto a steel ball at the base of the gear stick. On the side is the usual brass grease nipple. This was an easy bit to clean up, just pull it out the hull strip it down then rebuild and re paint.
The widget I am talking about is buried in the middle of this lot !
Then cleaned up into this
This was placed in storage awaiting its return. On the theme of gear sticks I thought I would continue to the other end of this system. From the base of the gear stick where the above widget sits is a shaft which runs through the centre bulkhead towards the rear, where another widget is bolted to the hull floor, the shaft runs through the widget and another large right angle cast component so fixed on. The cast item then connects to the swing bar on the gearbox which selects the gears.
Here is said widget removed from the hull and the shaft.
There is a cylinder which shrouds the cast poll, inside this is a bearing which floats with the poll and shaft and also allows the shaft to spin. I had to dismantle the shroud to extract the bearings and rebuild the unit. Once done it was cleaned down and rebuilt, then re painted and stored
Here is the complete unit before I pulled it out, partially hidden by a bracket which had fallen into the hull.
So far it's the little bits like this I have found give the greatest reward as you get quick results, and you feel you are getting somewhere
Last edited by Richie on Tue Dec 17, 2013 10:46 am, edited 1 time in total.
"You can screw a man down until he takes to drinking......take me to the fantastic place..."
Re: Richie's Little Tank
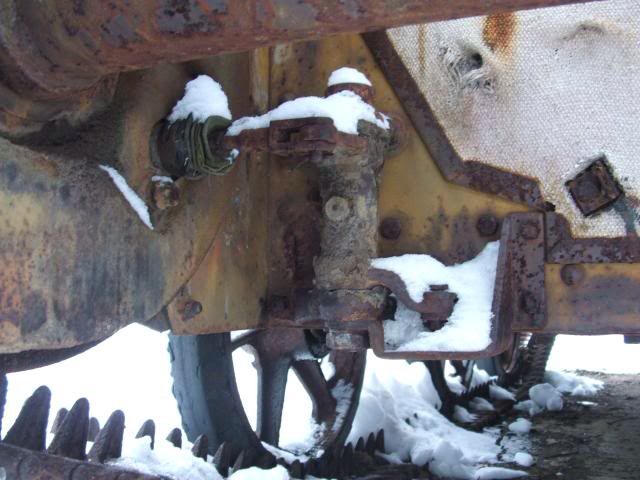
More and more bits were being plucked from the to do box, next on the list was the brake bell cranks, these sit on the lower transom of the hull and connect a push rod which runs from the front of the carrier, to the plunger on the expander unit for the brakes, and there is one on each side of the hull. The unit consists of a cast housing with a grease nipple, two brackets to bolt it to the transom, and a central spindle with needle bearings.
Here is the item as purchased
Again it was an easy enough job, just a case of stripping the thing down, attacking it with cellulose thinners to de grease, then a dose of wire wheel.
Each needle was counted out of the unit, then cleaned with thinners, once I had finished with the housing it was packed with grease and the axle spindle posted through, after that it was a simple case of slipping the needles back in and winding the nuts back on.
I still have to make some cork washers for the top and bottom.
Both are yet to be returned to the hull.
I continued on and thought I better start to try and collect bits for my dash panel (basically it's the starter button and all the gauges)
I did some wheeling and dealing and managed to secure an original Mk1 dash, two mk2 new old stock speedometers (one was still packed in its wax sealed box !!! Oil pressure gauge and ammeter and switch panel assembly again both new old stock.
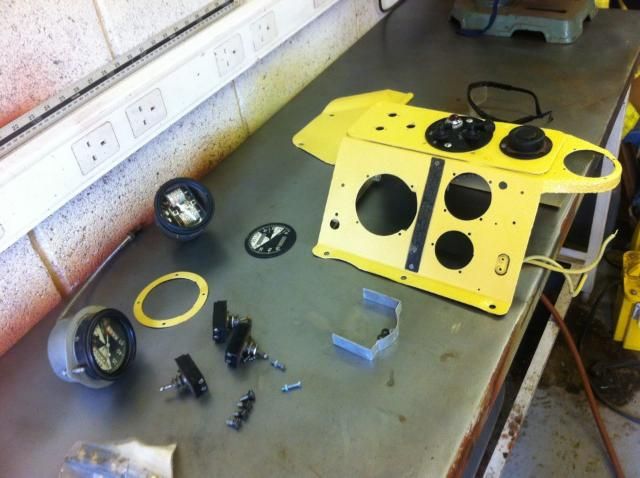
Note one of the speedo's has been stripped down....... I came under some serious fire for this, not because it is original material (these gauges are in abundance) but due to what the gauge contained
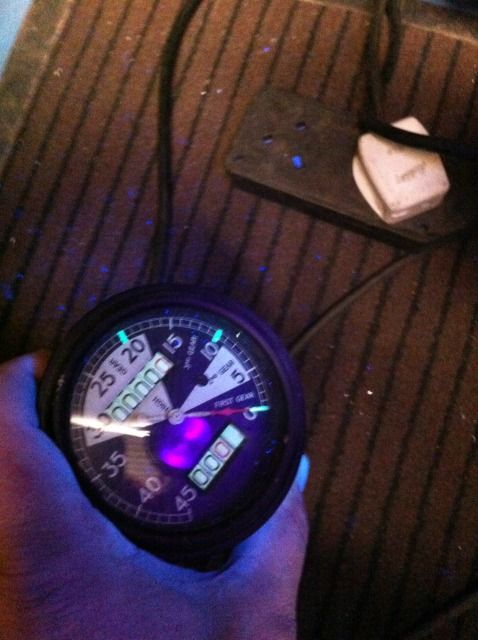
Note the glowing segments..........Radium 226.... Gauges of this era were radium luminised, not knowing at the time what I had potentially done to myself my bottom dropped out when I was told by a collector that I would be dead within a year...... As a result I contacted a doctor who specialises in the subject and was given advice how to clean down my workshop... The danger with this system is particle inhalation, luckily at the time I was wearing an appropriate respirator.. But none the less it took the wind out of my sails.
I collected surface samples before and after cleaning and sent them off for analysis which later confirmed I had cleaned the job down correctly.
When I rebuilt the gauge I fitted it with the correct mk1 style facia which I made and placed it back into the dash panel
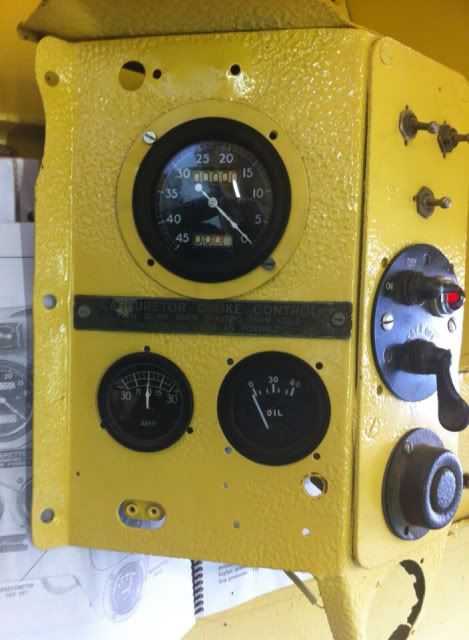
This needs wiring up which I need to get someone to do at some point.
On the subject of these gauges, it seems that as so many people know nothing about the genuine risks many museums are ripping gauges out of historic vehicles to have them destroyed.......utterly utterly foolish ! They pose no risk when sealed behind the glass but as it has the stigma of having an invisible killer, people tend to panic before engaging the brain.
(Probably something I should have done before stripping mine down)
There were mixed opinions about the patina on the dash plate, some are of the view that I should have filled the pitting, however I saw this as sanitising what I had, which if I was going to do that I would have made a new dash out of new material.......I kinda like the pitting anyhoo
Here is the item as purchased
Again it was an easy enough job, just a case of stripping the thing down, attacking it with cellulose thinners to de grease, then a dose of wire wheel.
Each needle was counted out of the unit, then cleaned with thinners, once I had finished with the housing it was packed with grease and the axle spindle posted through, after that it was a simple case of slipping the needles back in and winding the nuts back on.
I still have to make some cork washers for the top and bottom.
Both are yet to be returned to the hull.
I continued on and thought I better start to try and collect bits for my dash panel (basically it's the starter button and all the gauges)
I did some wheeling and dealing and managed to secure an original Mk1 dash, two mk2 new old stock speedometers (one was still packed in its wax sealed box !!! Oil pressure gauge and ammeter and switch panel assembly again both new old stock.
Note one of the speedo's has been stripped down....... I came under some serious fire for this, not because it is original material (these gauges are in abundance) but due to what the gauge contained
Note the glowing segments..........Radium 226.... Gauges of this era were radium luminised, not knowing at the time what I had potentially done to myself my bottom dropped out when I was told by a collector that I would be dead within a year...... As a result I contacted a doctor who specialises in the subject and was given advice how to clean down my workshop... The danger with this system is particle inhalation, luckily at the time I was wearing an appropriate respirator.. But none the less it took the wind out of my sails.
I collected surface samples before and after cleaning and sent them off for analysis which later confirmed I had cleaned the job down correctly.
When I rebuilt the gauge I fitted it with the correct mk1 style facia which I made and placed it back into the dash panel
This needs wiring up which I need to get someone to do at some point.
On the subject of these gauges, it seems that as so many people know nothing about the genuine risks many museums are ripping gauges out of historic vehicles to have them destroyed.......utterly utterly foolish ! They pose no risk when sealed behind the glass but as it has the stigma of having an invisible killer, people tend to panic before engaging the brain.
(Probably something I should have done before stripping mine down)
There were mixed opinions about the patina on the dash plate, some are of the view that I should have filled the pitting, however I saw this as sanitising what I had, which if I was going to do that I would have made a new dash out of new material.......I kinda like the pitting anyhoo
"You can screw a man down until he takes to drinking......take me to the fantastic place..."
-
Renegadenemo
- Posts: 5176
- Joined: Mon Dec 01, 2008 12:29 pm
- Location: N E England
- Contact:
Re: Richie's Little Tank
I'm sure Checkie will help you out with that...This needs wiring up which I need to get someone to do at some point.
I'm only a plumber from Cannock...
"As to reward, my profession is its own reward;" Sherlock Holmes.
'It ain't what they call you, it's what you answer to.' W.C. Fields.
"As to reward, my profession is its own reward;" Sherlock Holmes.
'It ain't what they call you, it's what you answer to.' W.C. Fields.
Re: Richie's Little Tank
What, MORE wiresRenegadenemo wrote:I'm sure Checkie will help you out with that...This needs wiring up which I need to get someone to do at some point.
It will be a pleasure Richie, no problem.....
p.s. I agree with your approach on the dash plate - spot on
1 in 10 people understands binary. The other one doesn't
-
Renegadenemo
- Posts: 5176
- Joined: Mon Dec 01, 2008 12:29 pm
- Location: N E England
- Contact:
Re: Richie's Little Tank
Agree completely - the pitting is a must, it looks brilliant.
I'm only a plumber from Cannock...
"As to reward, my profession is its own reward;" Sherlock Holmes.
'It ain't what they call you, it's what you answer to.' W.C. Fields.
"As to reward, my profession is its own reward;" Sherlock Holmes.
'It ain't what they call you, it's what you answer to.' W.C. Fields.